In this guide, you will be able to setup a UI where you can upload and talk to HUNDREDS of files (CSV’s, Spreadsheets, PDFs, Audio Files, and more!).
This guide is for Windows 11 specifically (Also works with Windows 10). However, the general idea will work with any OS.
System Requirements
- This can run on almost any system. If you are using a GPU, you will need to take note for GPU RAM (VRAM). If you are not planning to use your GPU, and only using CPU, you will need to take note of CPU RAM (RAM)
- The model in this guide is 4.14GB, which means it will load into your VRAM (GPU RAM) or RAM (CPU RAM). It will take around 4.14GB of RAM.
- Then the token size limit (Which you will set later in the guide) is 2048. You can change this number to whatever you want. If you do set it to 2048, it will use 2GB of VRAM/RAM in your computer.
So the stock settings in this guide: 4.14GB of VRAM/RAM for the model + 2GB for the Token Size Limit. Total = 6.14GB.
Increasing the token size, or using a larger model can lead to better results. But you have to have more RAM/VRAM.
If you have a 3090/4090 (24GB VRAM) you could use a 7GB model with a large context window (8GB, 9GB, 10GB, etc.). And it will run on that. If you have multiple GPU’s with 48GB RAM, you could run a 32GB model with 12GB token size. This is the finetuning/balance you will have to find to run your Local Model properly.
Minimum Requirements: Any CPU with at least 8GB of RAM AVAILABLE (So you will need to check Task Manager and make sure you have AT LEAST 8GB of RAM FREE). You do NOT NEED a GPU to do this. It will be faster with a GPU but better quality with CPU. The most important thing is RAM/VRAM Space you have.
Recommended Requirements: At least 1 GPU with 8GB VRAM, so that you can use the GPU Layers slider in LM Studio to MAX offload all the Model onto the GPU.
Best Requirements: Multiple GPUs with at least 48GB of VRAM total. So you can run a giant local model with a really big context window
Use Cases for this setup
There’s a lot of uses cases for a setup like this. Here are some examples you can use it as:
1. Chat with Repair/Shop manuals. A lot of new cars or old motorcycles have densely packed instructions manuals. You can use this to feed it PDF files and then ask it questions like “How much transmission fluid do I need for my 2021 Toyota Camry?”.
2. You can also use LM Studio by itself with VS Code to become/replace copilot. It can help you with coding.
3. You can feed it your personal data and have it help you. Taxes, Health docs, etc. This is all private and your data stays on your computer.
This guide is also to setup with your NVIDIA GPU
Prerequisites for NVIDIA GPU on windows:
- Install latest VS2022 (and build tools) https://visualstudio.microsoft.com/vs/community/
- Install CUDA toolkit https://developer.nvidia.com/cuda-downloads
- Verify your installation is correct by running
nvcc --versionandnvidia-smi, ensure your CUDA version is up to date and your GPU is detected.

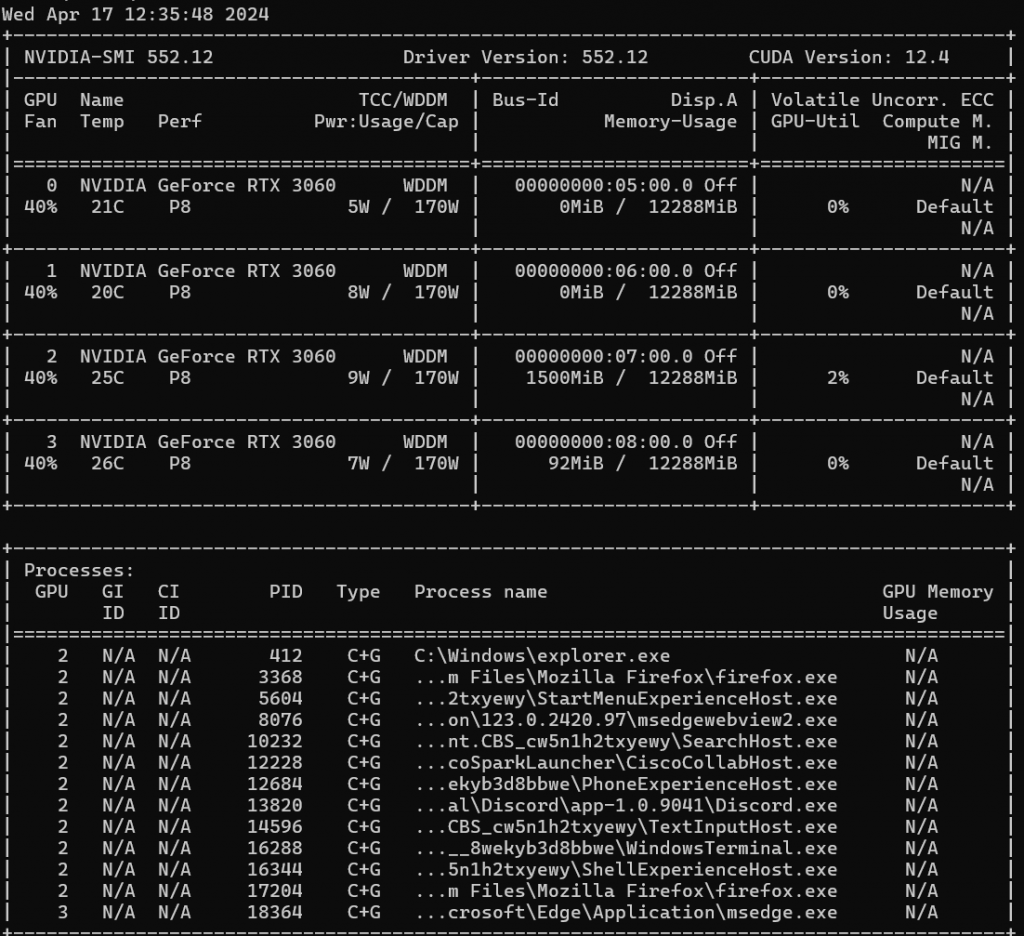
Make sure you can see something similar to that ^. I have 4x 3060 12GB graphics cards for my system.
This will allow whatever model you choose, to be able to use your GPU properly.
Download LM Studio: https://lmstudio.ai/
Download Anything LLM: https://useanything.com/download
LM Studio will act as a server for your local model. You can download and choose any model within LM Studio.
Anything LLM will be your UI interface and your Cloud Vector Solution for ingesting your documents.
- Setup and Install LM Studio
- Go ahead and double click the installer (LM_Studio-0.x.x.x-Setup.exe) and install LM Studio. It will automatically open up.
- Once LM Studio is open, click the Folder icon. Then go ahead and install Mistral_7B. Just for this example. You can choose another model to your liking later on.
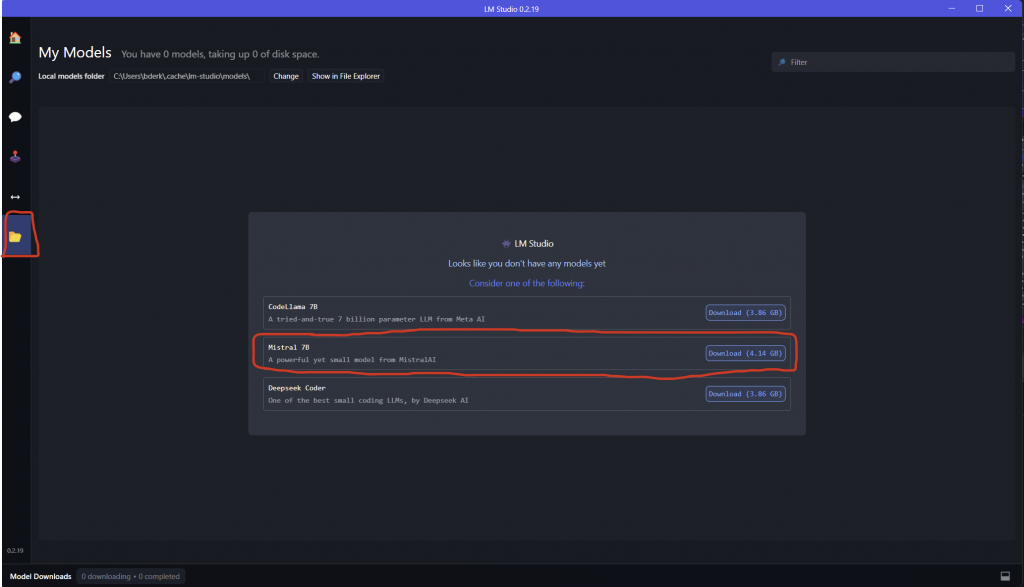
- Click on the ‘local server’ icon: <–>

- Select the model you just downloaded

- Make sure you set the GPU Offload Layers to maximum
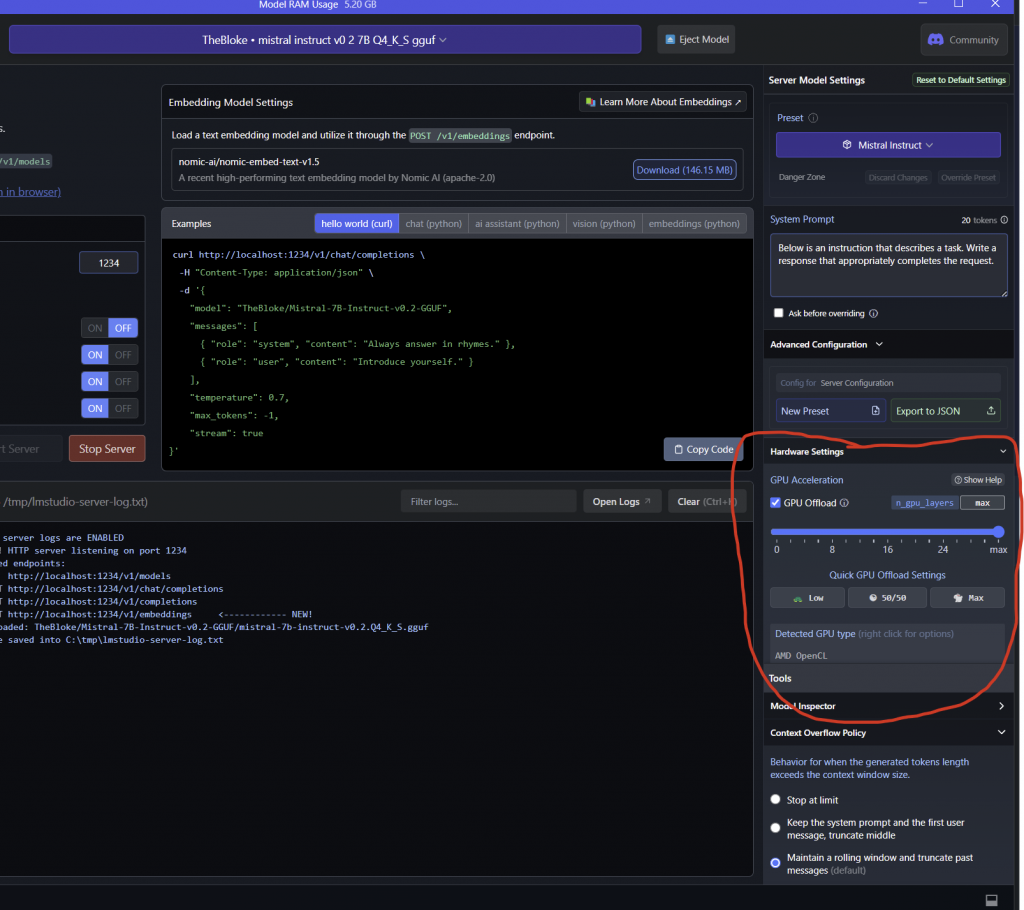
- Reload the server after every time you change settings

The model will then load into your RAM (And possibly VRAM)
Your server is now setup. We will move onto setting up the Ui and document ingest with Anything LLM
2. Install and Setup AnythingLLM
- Go ahead and double click on the installer (AnythingLLMDesktop.exe)
- It will open up, go ahead and click “Get Started”
- On this page, scroll down and click “LM Studio”

- Going back to LM Studio we need to get the URL and Token Context Window size
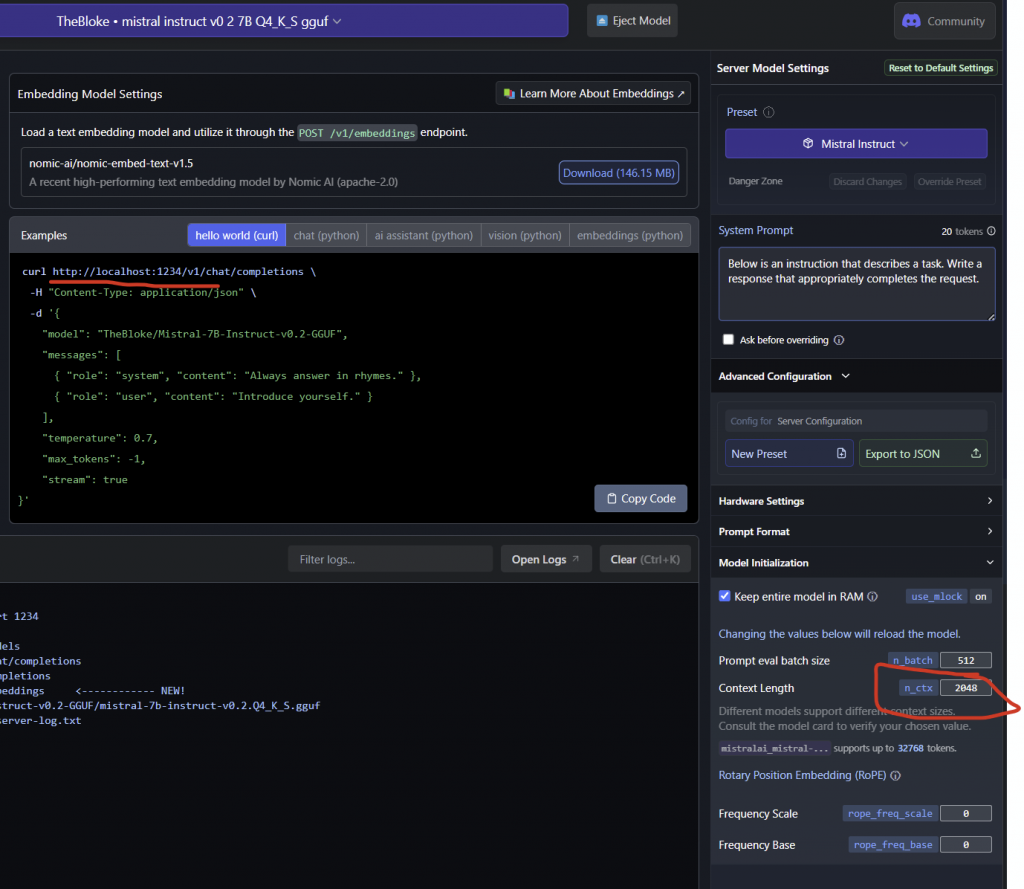
If you noticed, that this specific model, supports up to 32,768 tokens, that doesn’t mean you should max it out. We recommend you use 24,000 tokens max. otherwise it starts spewing weird answers.
- Going back to Anything LLM we will type in the LM Studio server details (URL and Token Context Window, Chat Model Selection is auto loaded with what you selected in LM Studio server model selector)

Make sure to match the Token Context Window with the same settings you have in LM Studio.
If you noticed, that this specific model, supports up to 32,768 tokens, that doesn’t mean you should max it out. We recommend you use 24,000 tokens max. otherwise it starts spewing weird answers.
EXAMPLE:


The larger the context window, the more your RAM/VRAM is used.
I recommend using 2048 as a token size to make sure you have everything setup correctly. Then try a bigger token size later (2048->4096->8192, etc.). It won’t work if you run out of VRAM.
- Use the recommended Embedding Preference
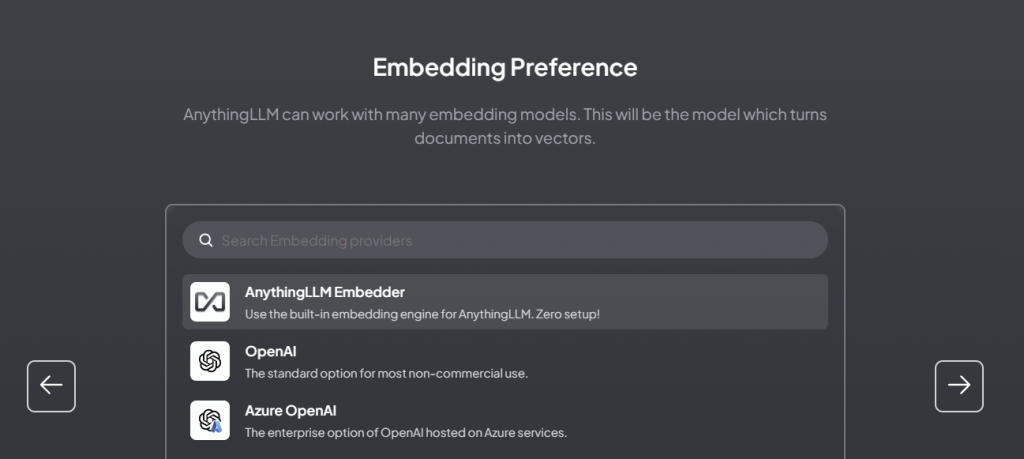
- Use the LanceDP options

- This is how we have it setup

- Enter your email and click whatever applies and click next

- Enter your workspace name
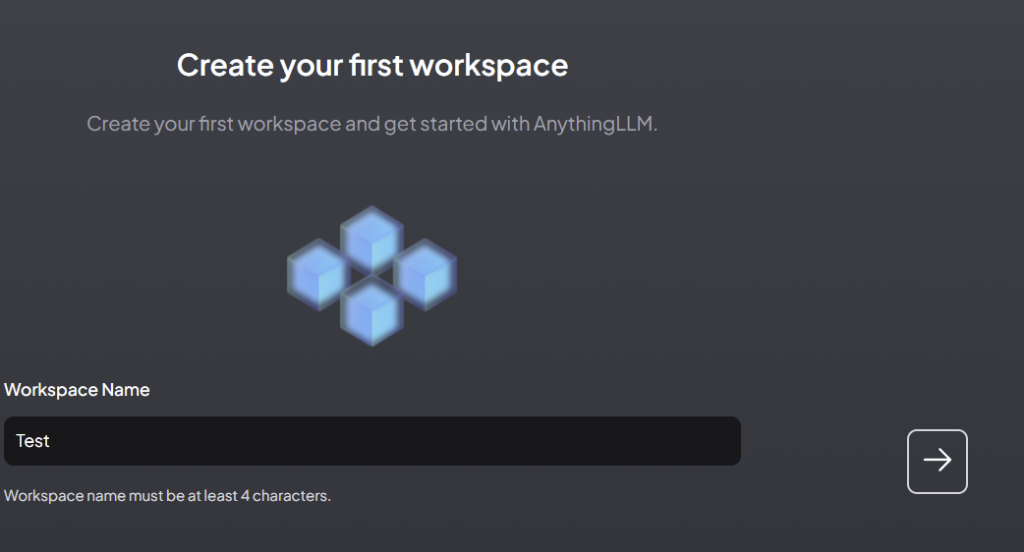
You have now setup everything you need to start talking to your documents!
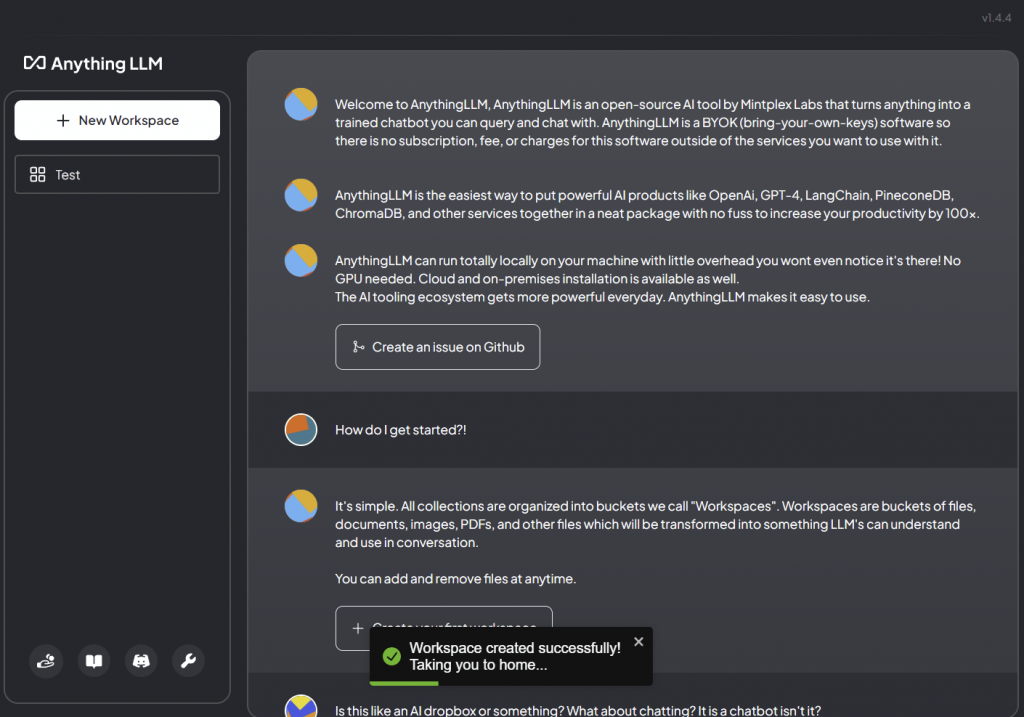
- You can highlight over the workspace and click the upload button to store your data into the Vector database and then talk to your documents.


Once you do that, you can create separate threads like you can in chatGPT and start talking to documents.
Here is my setup with the 4x 3060 12GB GPU’s
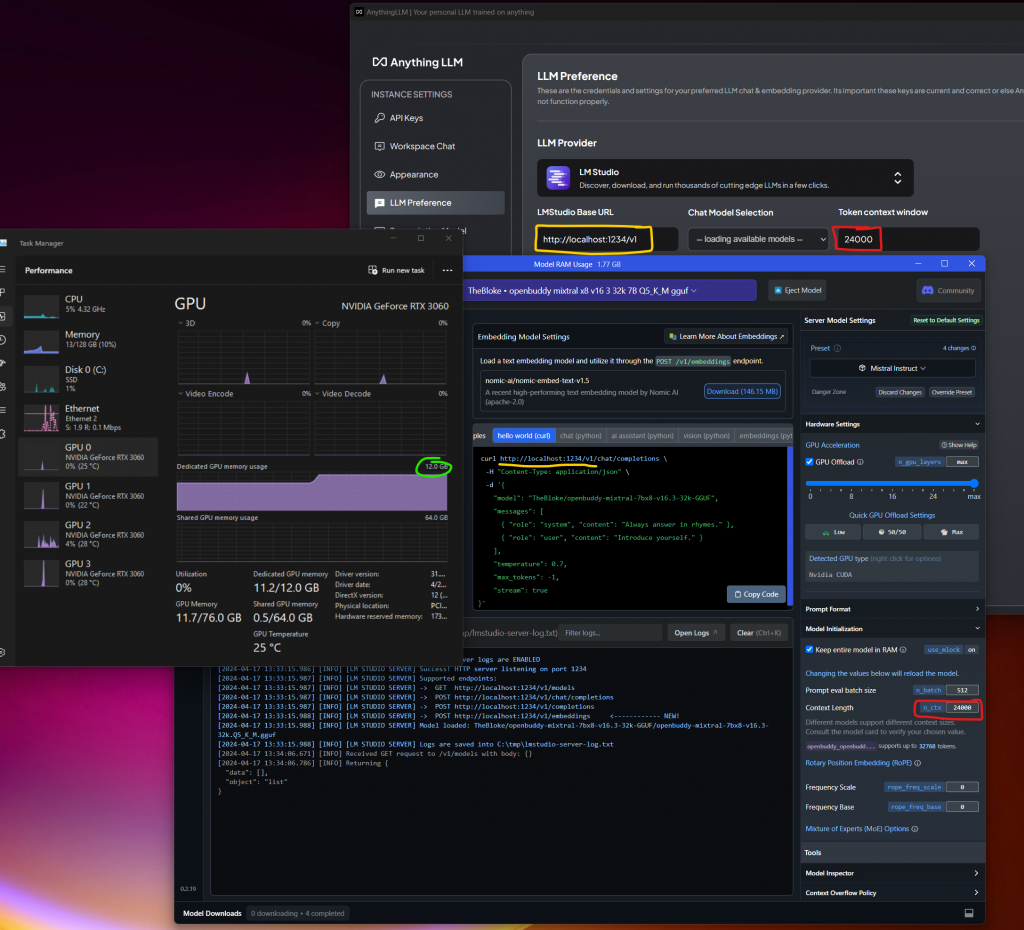
I am using openbuddy-mixtral-7bx8-v16.3-32k-GGUF
I also set the token limit to 24,000.
Make sure you talk to the bot and see if it’s replying properly before you upload your docs.
Try other models and see what runs right. There’s a lot of fine tuning with:
Context Window Size (Token Limits). If it’s too much, the bot will start talking weird. So try small first, then go bigger and bigger, if that’s what you want.
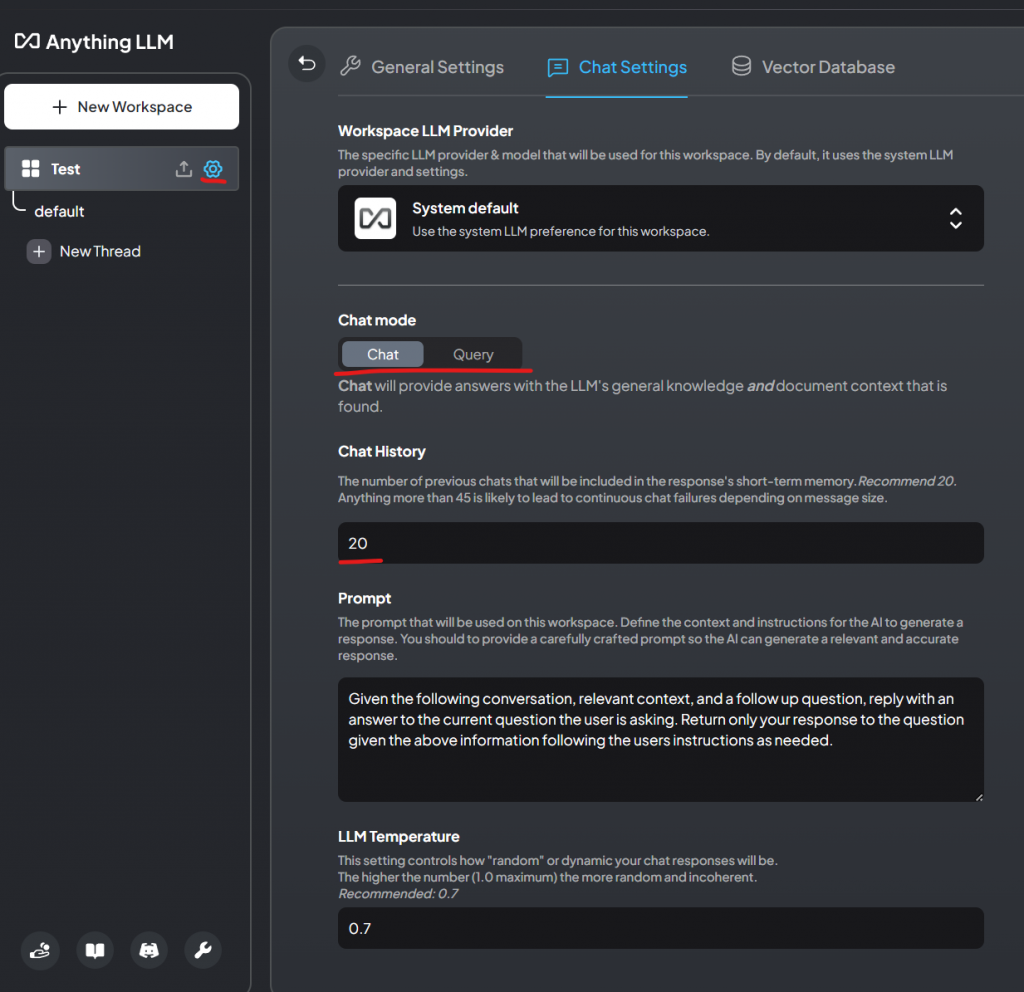
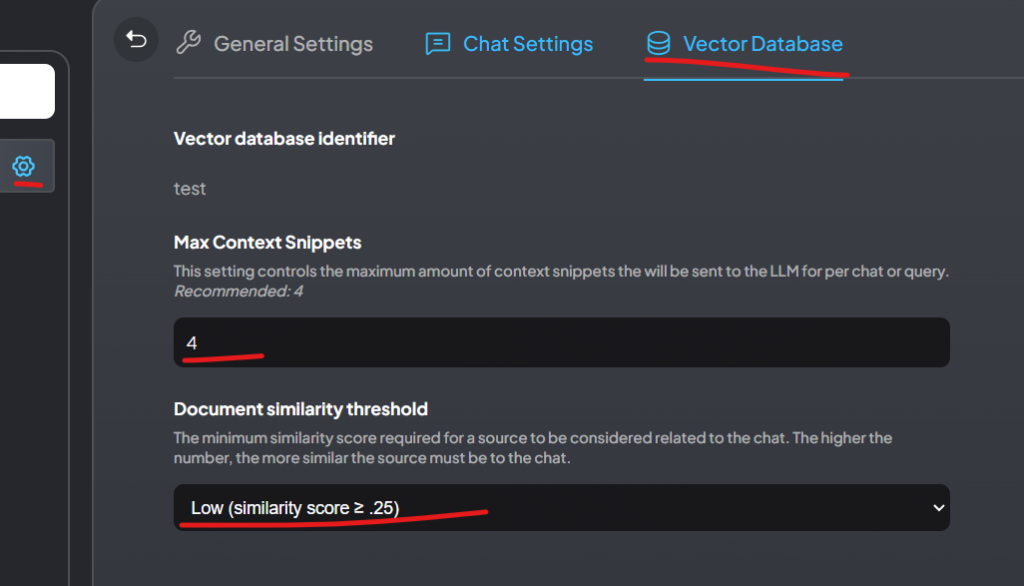
To get your desired result, you will also need to mess with these settings:

Leave a Reply